MAKING A HOOD
First off, I want to emphasize the fact that I am not a "hood-maker". I have only made a handful of them in all of my life, most of which I would never put on a bird. However I am a supporter of those who appreciate the challenge and satisfaction of creating their own falconry equipment, and it is my goal here to share my ideas on a particular hood style that I have taken a recent interest in. And I hope that people will feel free to take my ideas and run with them. While what I do is not in anyway original, it is new to me, and I imagine it will be new to many who read this. So there you have it, this is just something I've been playing with lately and wanted to share. I hope the reader will share his/her own input on what they see here.
I myself have several variations of this pattern that was originally produced by Lance Morrow, and have come to find one that is particularly easy to work with and (in my opinion) looks the nicest when finished, and more importantly seems to fit a hawk well. But it should be noted that Lance himself cautioned me that this pattern was developed for eagles.
I myself have several variations of this pattern that was originally produced by Lance Morrow, and have come to find one that is particularly easy to work with and (in my opinion) looks the nicest when finished, and more importantly seems to fit a hawk well. But it should be noted that Lance himself cautioned me that this pattern was developed for eagles.
The Tools
- Rotary Hole Punch

- Exacto Knife Set
- Cutting Board
- Stitch Marker
- Blunt Upholstery Needles
- Waxed Dental Floss
- Forceps
- Contact Cement
- Straight Edge Ruler
- Suitable Leather
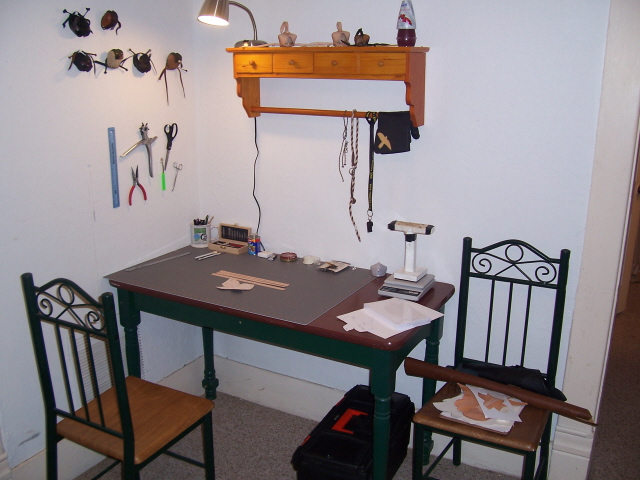
I dont have enough experience to say that any particular brand of needle or glue is better than the other, etc. I think that with a little research and trial the reader will find things that work well for them. I will say that having everything ready and having an organized work space will make the process much more enjoyable!
Getting Started
The first thing to do is to transfer your pattern onto the leather. I like to print mine on card stock because its a little more rigid than your average printer paper and allows for easier tracing. I draw the pattern using a ball point pen on the back of the leather.
The first thing to do is to transfer your pattern onto the leather. I like to print mine on card stock because its a little more rigid than your average printer paper and allows for easier tracing. I draw the pattern using a ball point pen on the back of the leather.
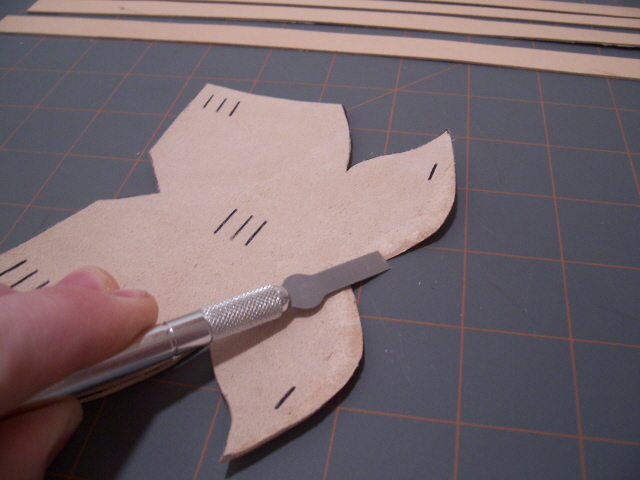
 I have found that this size fits a female redtail pretty well.
I cut the hood out along with some strips (for braces, top-knot, piping & chin strap) using an exacto knife. I just make straight vertical cuts. Using angled cuts around the "eye" areas might make for a better seem if you want to glue the hood.

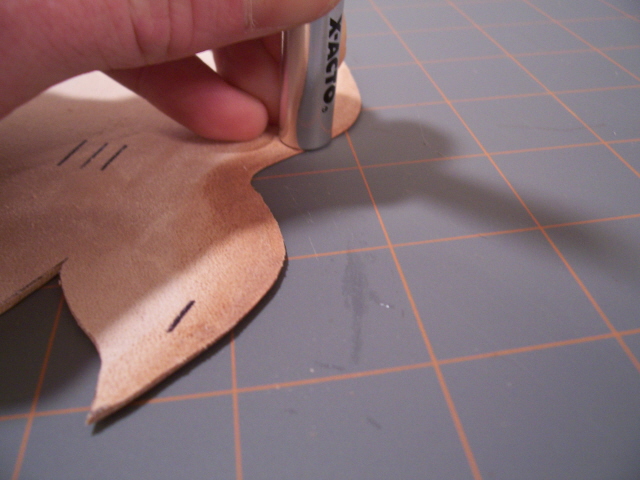
Once everything is cut out I like to use a flat blade to shave down the edges of the beak opening. This makes it easier to form the opening to your bird.
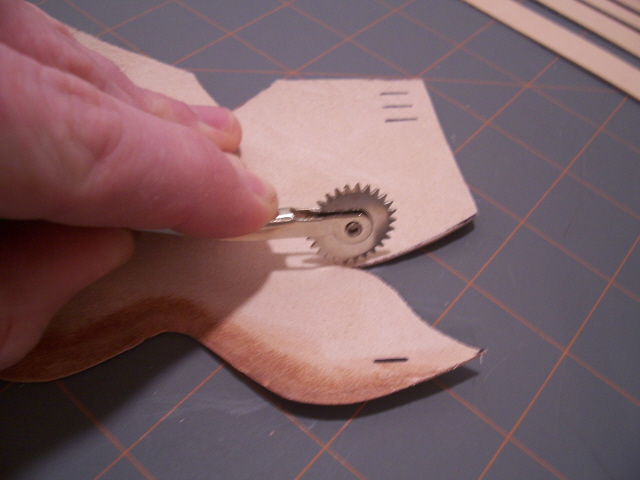
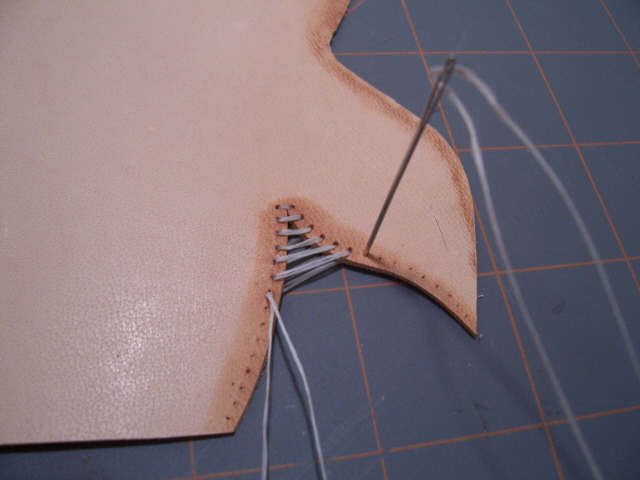
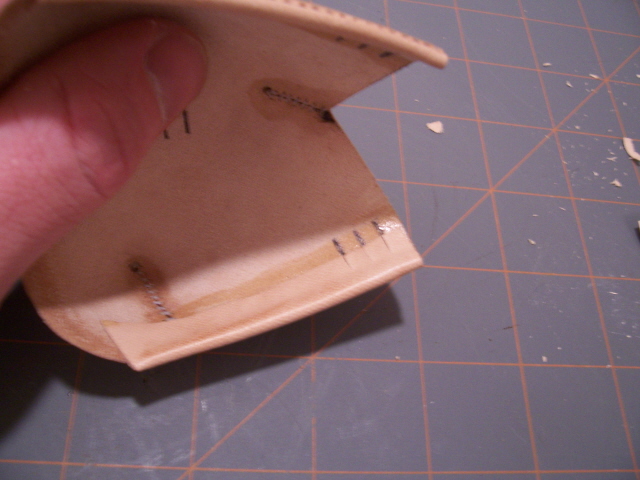
Then I mark the stitch holes with a rotary stitch marker. And use a small "awl" to punch them. I simply make straight holes rather than the angled holes used for cross stitching. Placing a piece of thick leather under the hood will aid in the process.
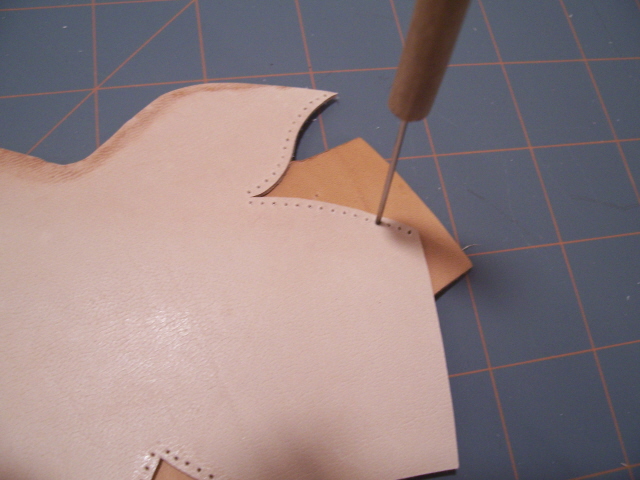
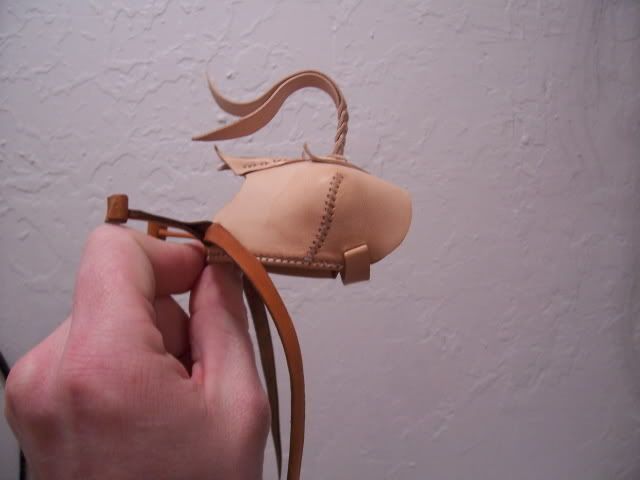
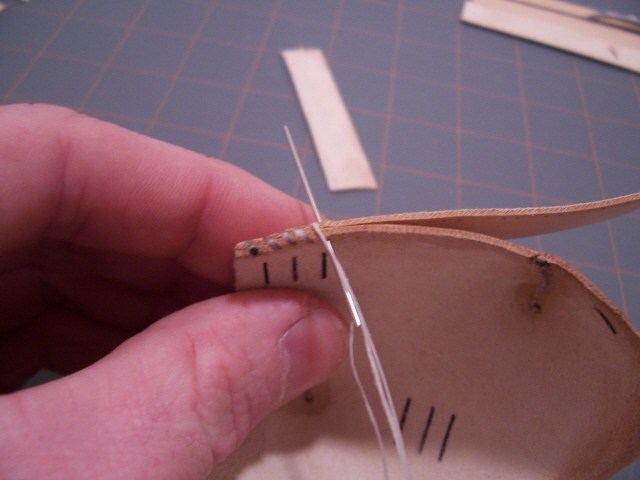
I begin sewing with the eyes and then the notch at the back of hood (in other forms of this pattern the notch is replaced with a tab). Care should be taken when sewing the hood to prevent tearing the holes. Keeping the leather damp with a wet rag will help prevent tearing, as well as using good leather. Tighten the stiches as you go. As you can see I use dental floss that is doubled over. Using a blunt needle makes it easier to sew. At the end of the seam I just go back through my last stitch and tie a quick knot. You can melt the tag ends down with a lighter to finish the knot.
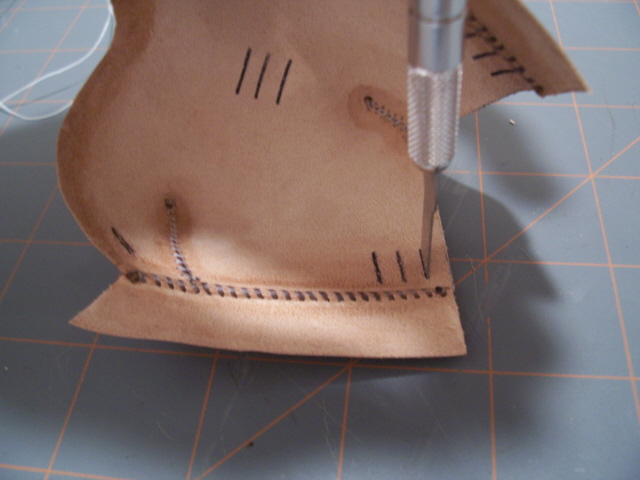
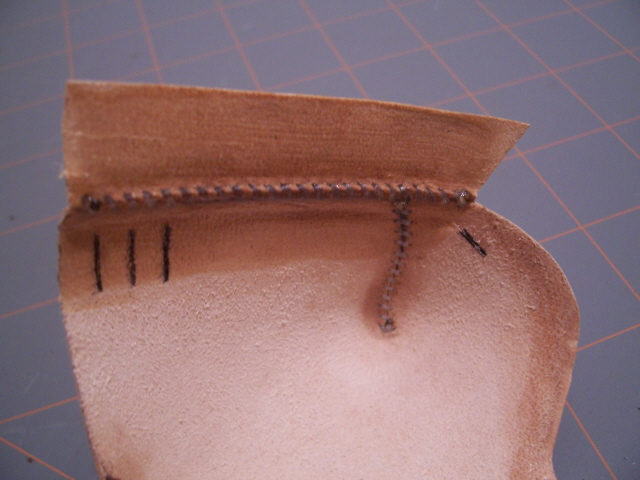
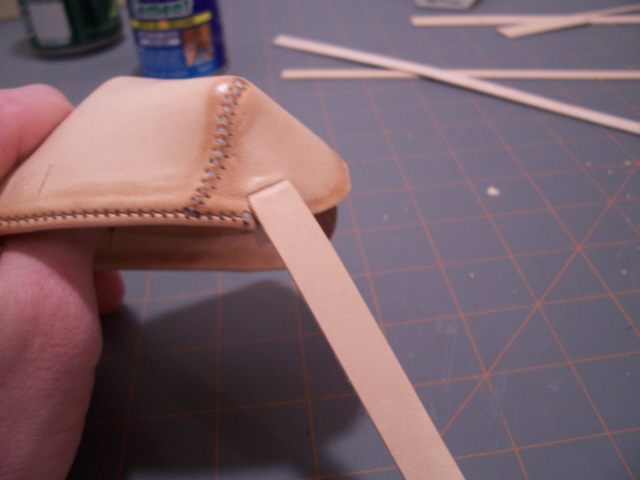
Now I mark and awl the holes for the piping, starting from the back of the hood and ending flush with the slot for the chin strap. Then I cut a strip of leather for the piping and thin it down a little (it would be easier to simply buy some thin leather! probably would be more aesthetically pleasing too) and mark and awl the holes for it. The piping is sewn on with the piping sitting flush with the bottom of the hood and on the outside of the hood (smooth sides together). This needs to be a tight stitch.

Now allow the hood some time to dry, and cut the slots for the chin straps and braces etc. You can then apply some contact cement to the area of the piping and after it has dried simply fold the piping over into the inside of the hood. A little burnishing with a dowel will smooth out the edges. this is a good time to insert and glue one side of the chin strap as well.
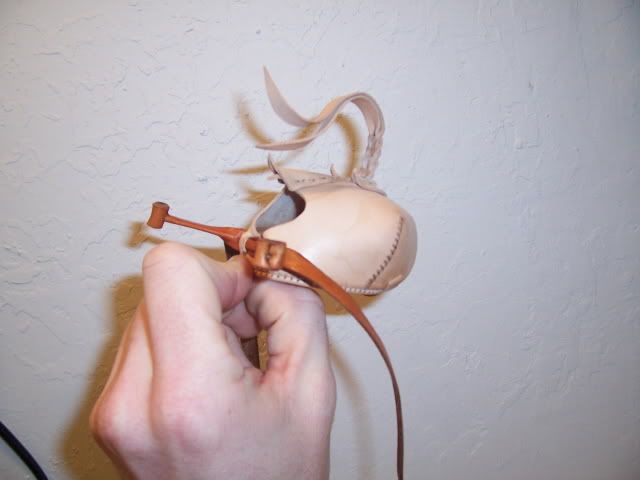
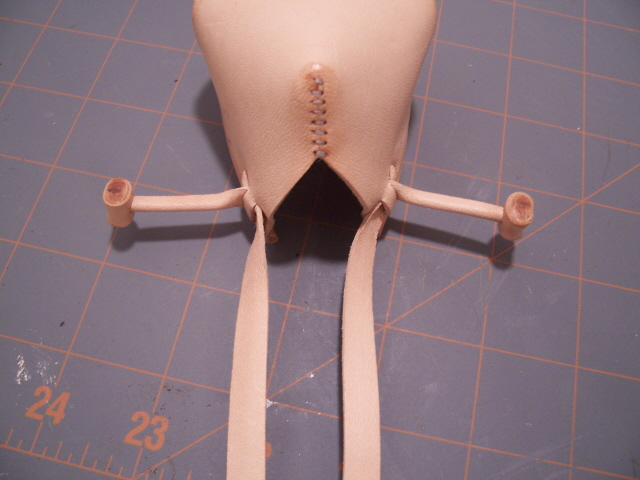
I will assume that everyone knows how the braces work and are put together. If your piping extends into the area of the slits for the braces a little extra cutting will be in order, and then the braces can be added. Be sure to work them open and closed several times to help get things seated before using them on a bird.
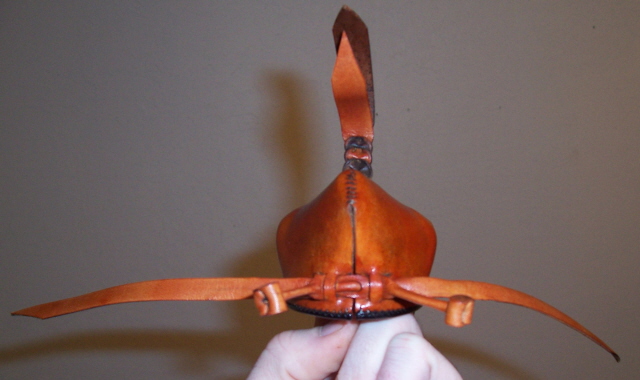
After the addition of a top-knot which can be made in many ways the hood is pretty much done.
A little molding with the fingers and some water will help make a little extra room and get things looking proper. Then you just need to adjust the chin strap to fit the hood to your bird.
A little molding with the fingers and some water will help make a little extra room and get things looking proper. Then you just need to adjust the chin strap to fit the hood to your bird.

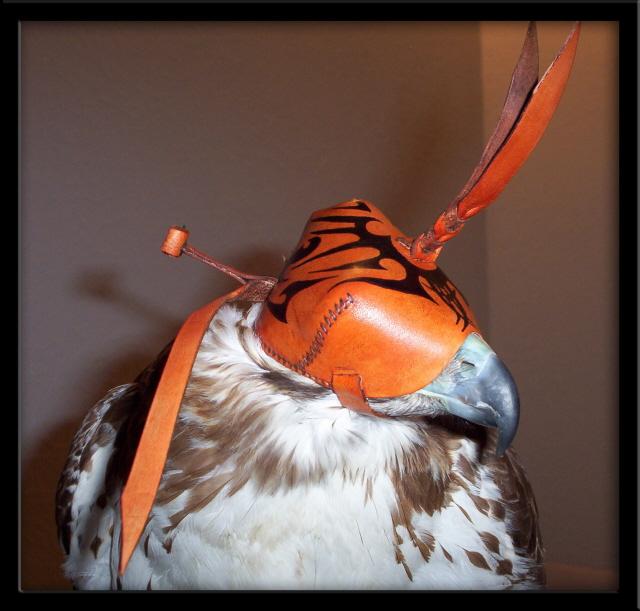
Finishing
A little shoe polish can make for a good looking hood and I like using a permanent marker to add a personal touch to mine.
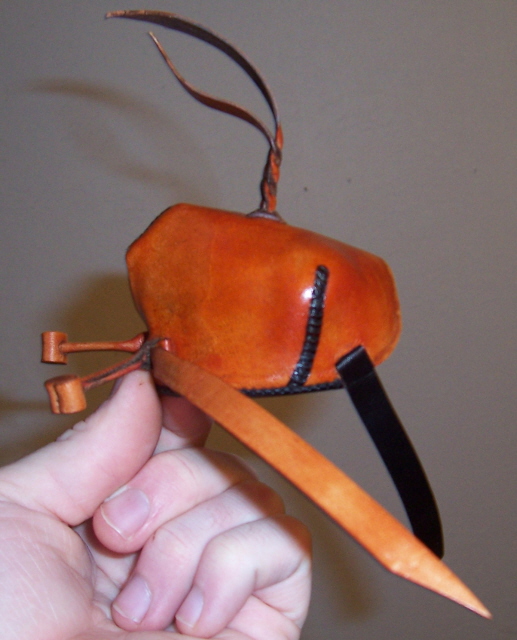

This is a new pattern I've been working with.