slideshow
Friday, February 09, 2007
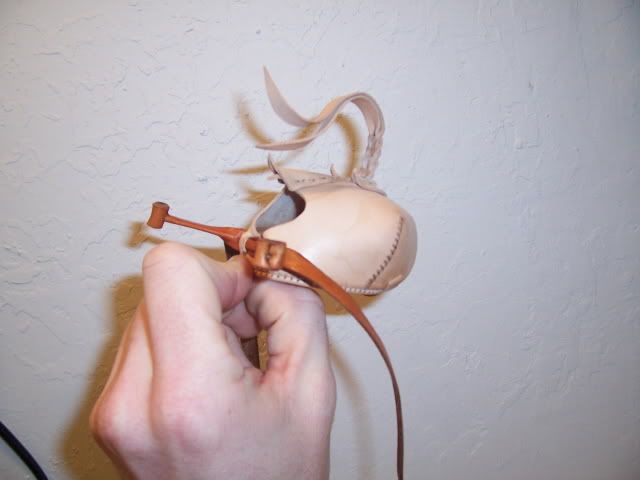
top-knot
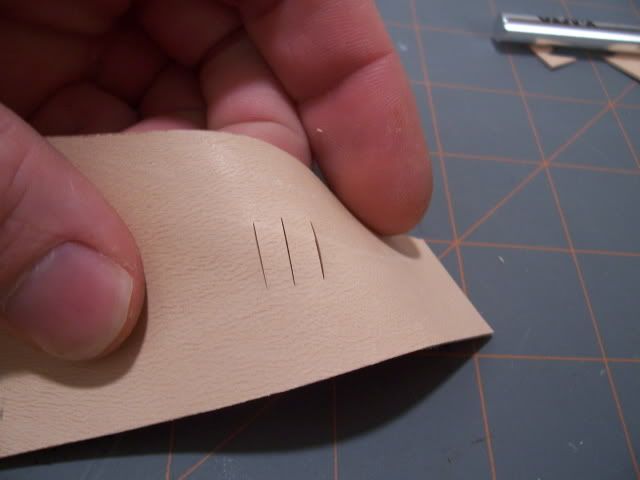
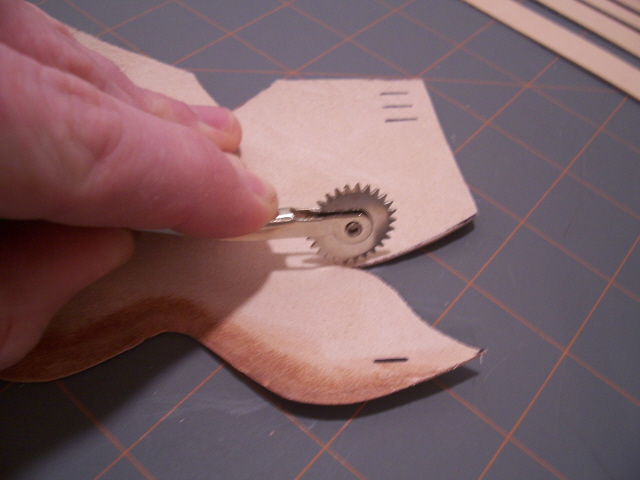
It is a very simple, yet effective knot, but I can see how its construction might be easier if a person saw how it was done first. So this is just a quick pictorial demonstration on it.
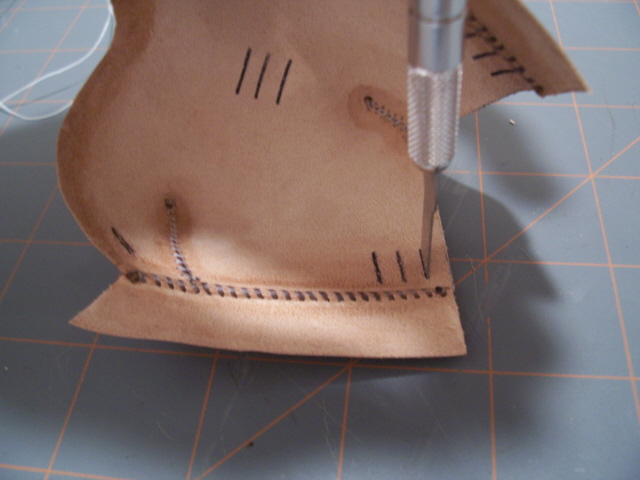
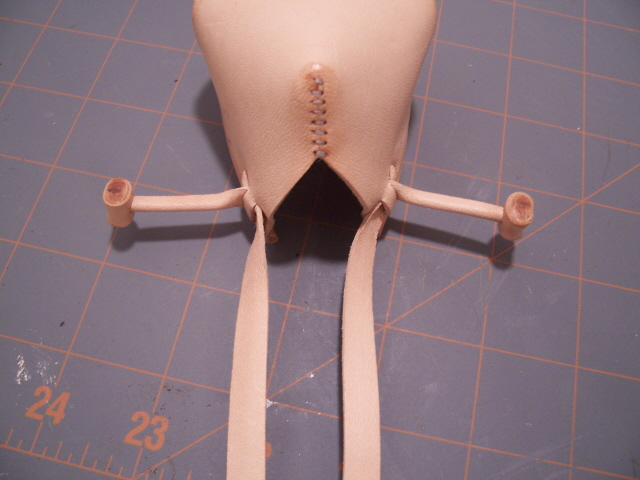
((A pair of hemostats will make this process MUCH easier))First off, you start by cutting 3 slots in the hood (where ever you want the top knot to be)
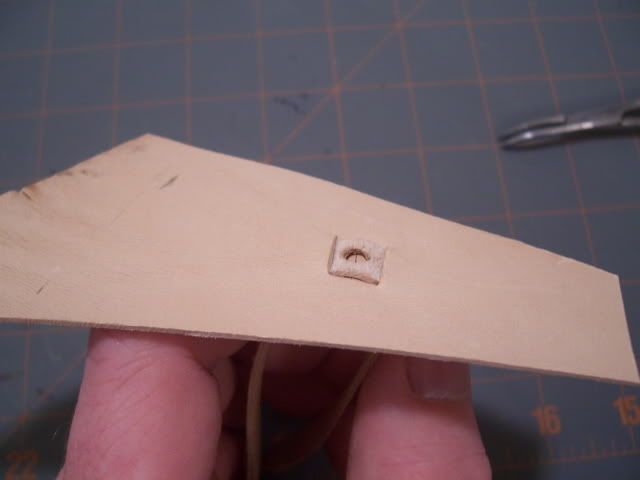
Then you need a strip of leather with a hole punched in the middle.

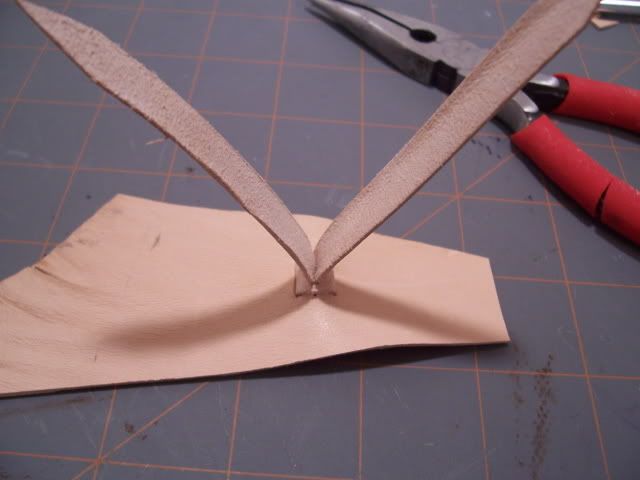
pull the ends of the strip through the outer slits and into the "hood" sorry I had to do this with leather scraps! Make sure the rough side of the strip is up and that the hole lines up with the middle slit.
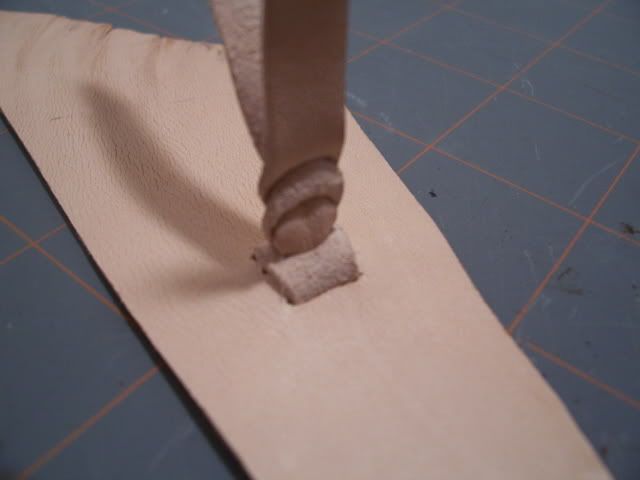
Now pull both ends up through the middle slit and the hole. (The finished sides will both be pointing out now.)
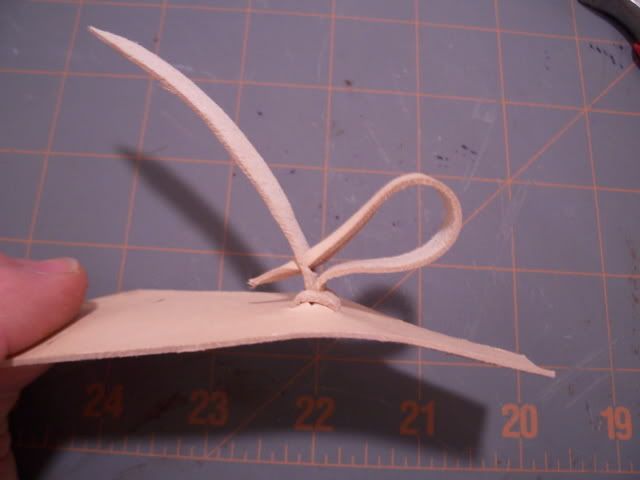
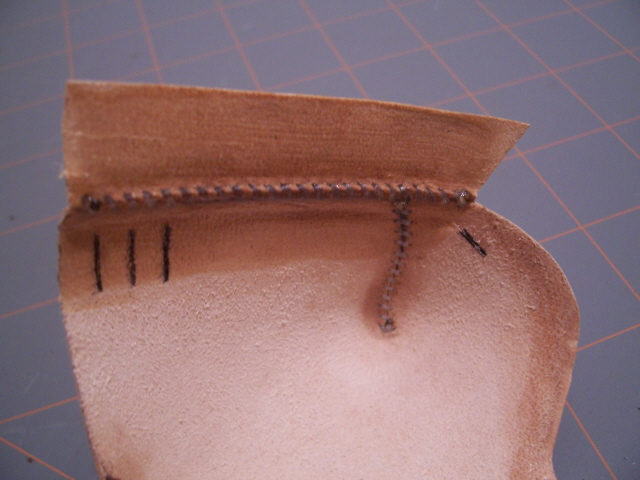
This is where the look comes from, punch a hole at the bottom of the back tab and pull the front tab through it. It will look different if you start with the back tab through the front......I prefer the later.....
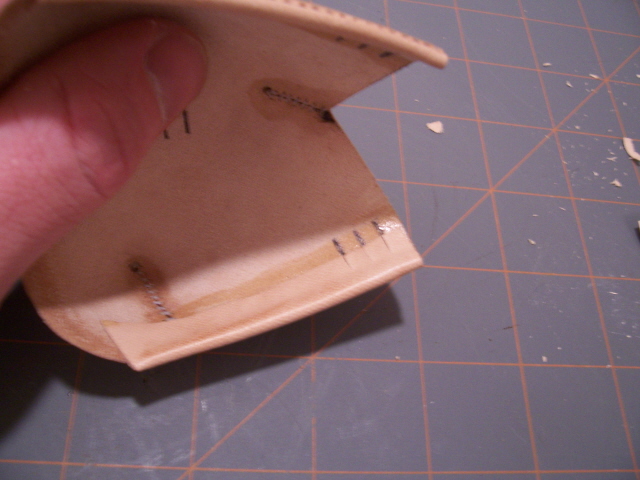
Then do the same thing over and over again alernating the tab that gets punched....until you like what you see!
A little water and some burnishing will smooth out any imperfections you encounter.
Thursday, January 25, 2007
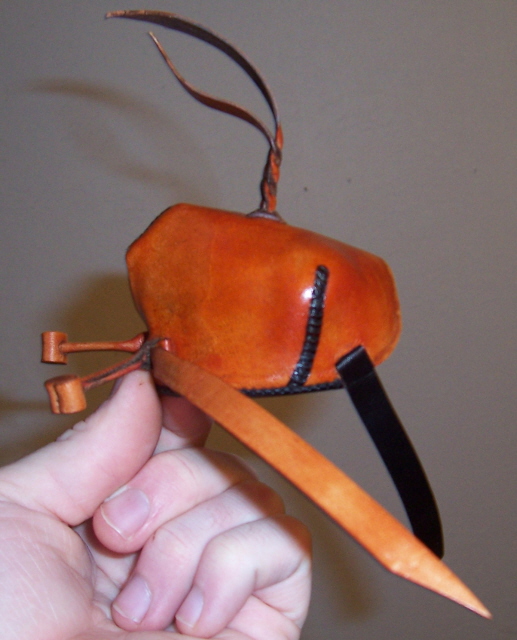
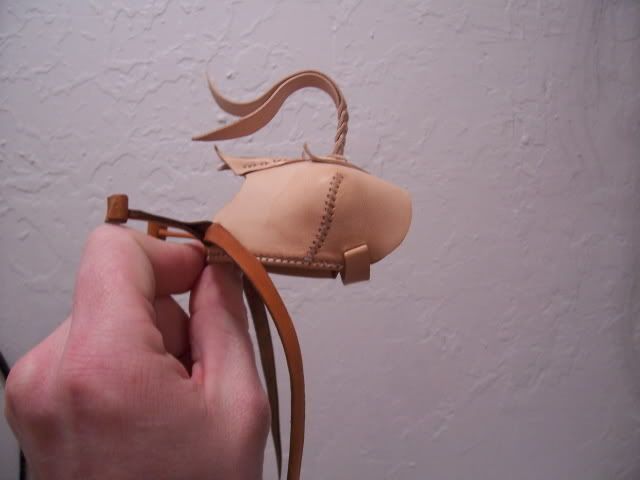
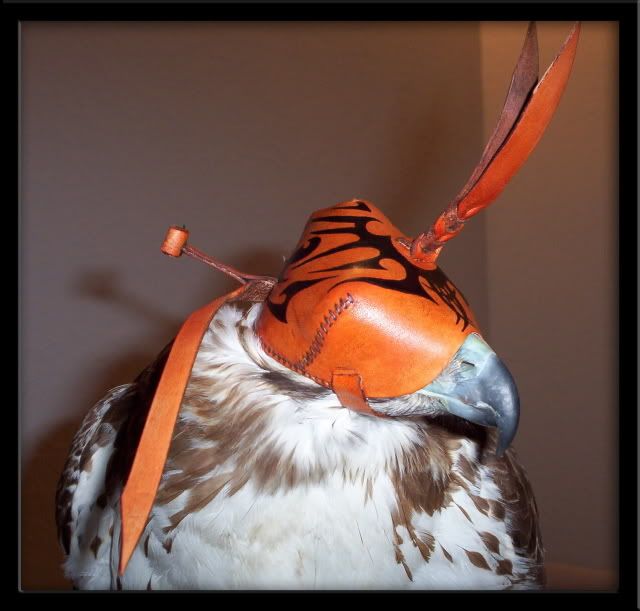
MAKING A HOOD

I myself have several variations of this pattern that was originally produced by Lance Morrow, and have come to find one that is particularly easy to work with and (in my opinion) looks the nicest when finished, and more importantly seems to fit a hawk well. But it should be noted that Lance himself cautioned me that this pattern was developed for eagles.
- Rotary Hole Punch

- Exacto Knife Set
- Cutting Board
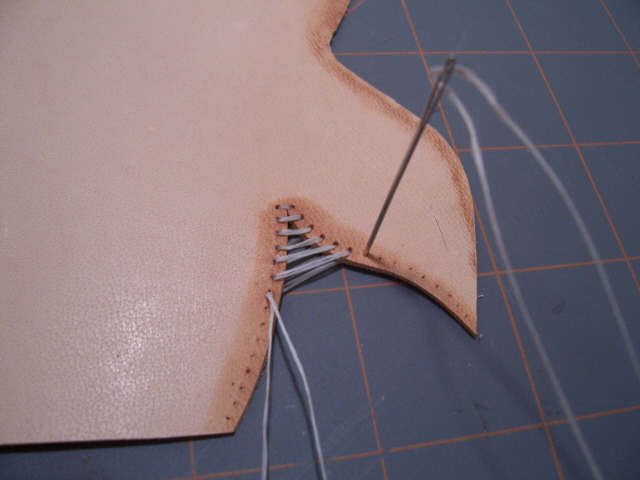
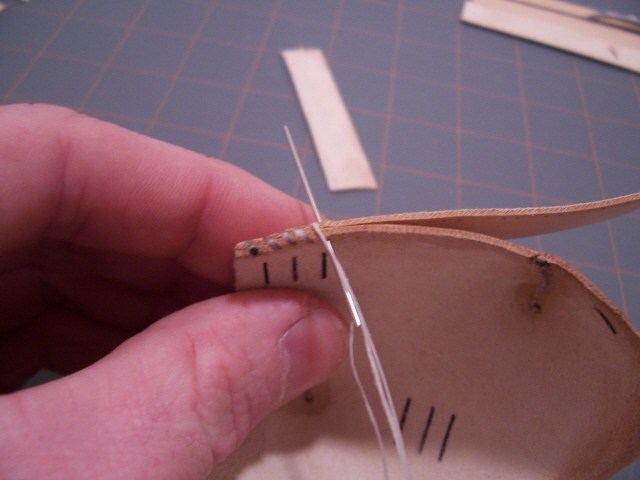
- Stitch Marker
- Blunt Upholstery Needles
- Waxed Dental Floss
- Forceps
- Contact Cement
- Straight Edge Ruler
- Suitable Leather
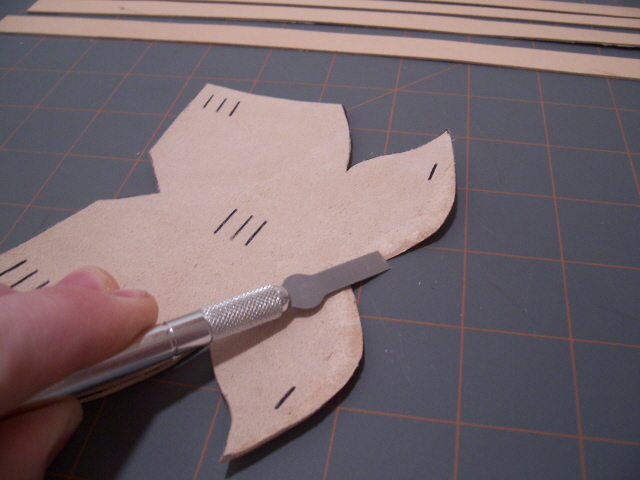
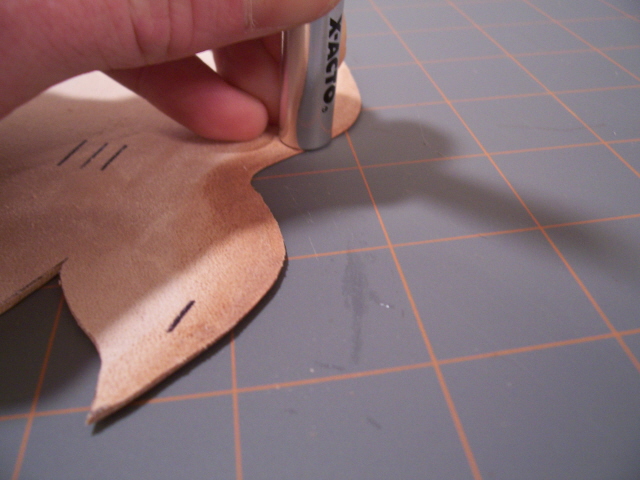
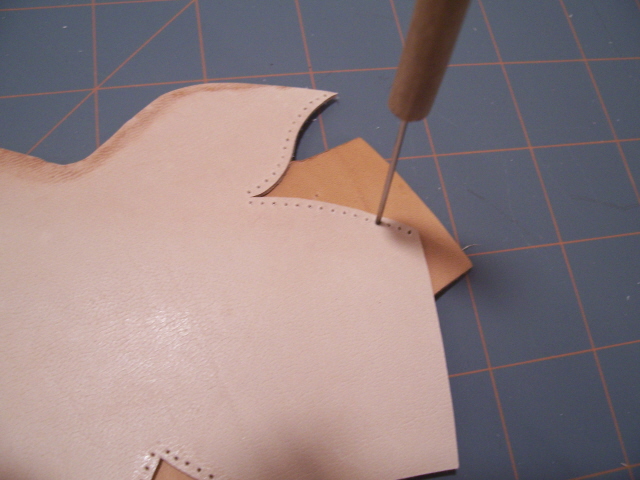
The first thing to do is to transfer your pattern onto the leather. I like to print mine on card stock because its a little more rigid than your average printer paper and allows for easier tracing. I draw the pattern using a ball point pen on the back of the leather.
 I have found that this size fits a female redtail pretty well.

A little molding with the fingers and some water will help make a little extra room and get things looking proper. Then you just need to adjust the chin strap to fit the hood to your bird.

Finishing
A little shoe polish can make for a good looking hood and I like using a permanent marker to add a personal touch to mine.

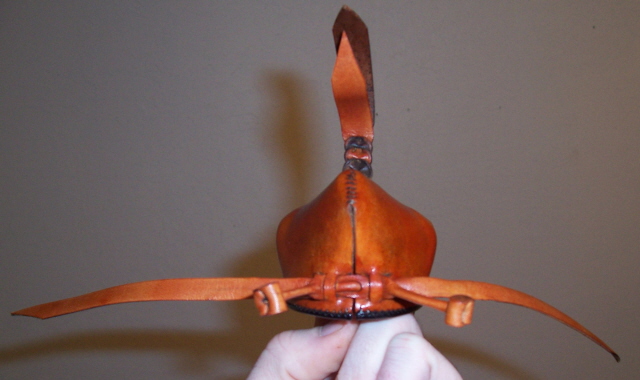
This is a new pattern I've been working with.
Saturday, January 20, 2007
Uta's pics


Saturday, December 09, 2006
BREEDING RATS
Why Breed Rats?
Rats are a great whole food item for captive predators, especially reptiles and raptors. Rats are a common food item for these animals in the wild and breeding rats for their consumption in captivity is an easy way to provide a healthy and natural diet. Because the domestic rat breeds so readily, has large litters of fast growing young and is easy to care for, it is a great choice for the keeper who wishes to produce a good food supply for his animals. Aside from simply being easy to produce, rats are a lot of fun to have around. Each one has its own personality and they can be quite comical at times. You will soon find that certain individuals will become your favorites in a breeding group and the more you interact with them the more entertainment they provide! Perhaps the biggest reason for breeding rats at home is the financial aspect of it. Buying rats frozen is the normal alternative, but you can save a lot of money by breeding them yourself, which I will get into later on.

Rat Husbandry
Rats are rather undemanding captives. If given food, water and shelter rats will breed willingly. Aside from these basics, I believe temperature plays the biggest roll in rat production. Rats put out a massive amount of heat for their size and thus they need a cool environment. I prefer to keep them at no more than 60 degrees f.
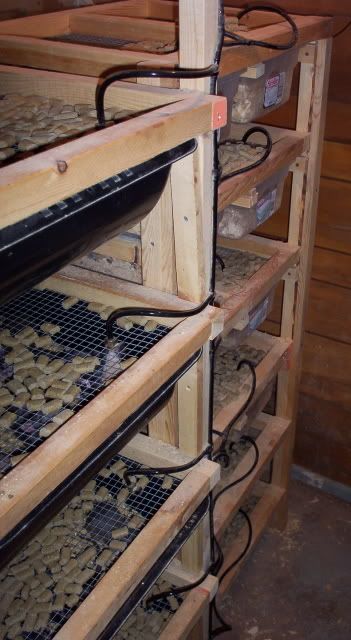
Housing: Rats are social animals and can be housed in large numbers. Of course there are limits to how many rats can be housed in a given area, but as long as common sense is used you can fit a lot of rats in a small room. The most common method of housing is racks. Rat Racks consist of a framework that holds rows of tubs that can slide in and out. Each tub sits under a framed top that has a hardware cloth bottom. This hardware cloth serves 3 purposes. It keeps the rats in the tubs, holds the food, and acts as an anchor for the water nozzles. I prefer to use 1/2 inch hardware cloth.
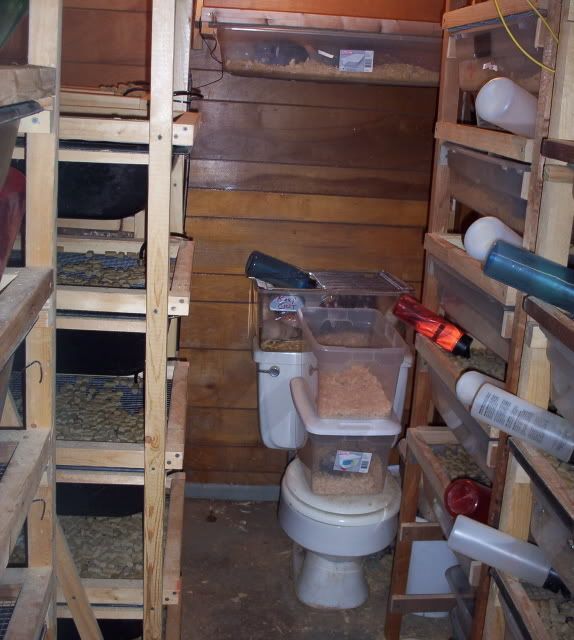
Racks can be made out of many things but wood tends to be the preferred material. The dimensions of the rack will depend on the types of tubs you choose to house your rats in. Often a variety of sizes are used to accommodate different individual animals or groups of animals. I keep my males in large concrete mixing tubs, and single females are kept in 12 qut. Sterilite containers. But I have other racks that hold 32 qut and 41 qut tubs for growing weaned rats. Its all a matter of preference. Cat litter tubs are commonly used as well. The most important factors to consider when buying tubs, is to find tubs with a height of 6-7 inches that have a smooth inner surface. Any edges or sharp corners will be a target for chewing by the rats, and they can chew through a tub very quickly.
Bedding: Aspen shavings are a good bedding for rats. They are non-abrasive and very absorbent. Aspens biggest drawback is its price. Aspen can be pricey, even when bought in bulk. That’s why I use and recommend pine bedding for rats. There are debates that would lead a person to believe that pine and cedar bedding is naturally toxic and irritating to rats. And I believe that cedar is and should be avoided completely but, my experience has been that pine works quite well and the rats show no ill effects from being in contact with it.
Food: Rats will eat just about anything. My experience and the experience of others has lead me to believe that the best diet you can feed a breeding colony of rats is Mazuri 6f rodent breeder formula. My rats are maintained on this pellet formula exclusively, but I'm sure that adding the occasional seeds or greens to their diet might help. If feeding such a pelleted diet, you can simply pile the food on the wire on top of the cages, the rats can easily eat through the wire yet are unable to soil the food with urine or feces.
Water: Rats drink a lot and need a constant supply of fresh water. There are two simple ways to give them the water they need, one of which is easier than the other. The first and easiest option is to use an automatic watering system which basically consist of a refillable reservoir that feeds a series of tubes that end with a nozzle in each housing compartment. This system can be supplied directly from a water line but you must install some sort of pressure regulator if you do this. I prefer the 3/16" tubing and accessories.
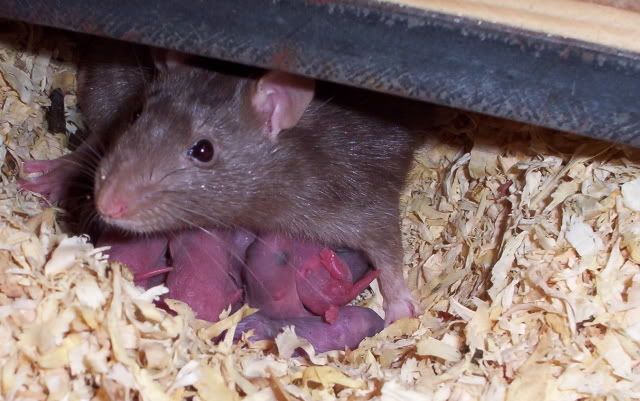
An additional 4 weeks of growth for weaned rats should yield sexually mature rats they weigh around 200 grams. With males being slightly larger than females on average. When it's all said and done the process from conception to weaning takes approx. 54 days. With an average litter size of 10 pups, a single female should produce 60 offspring in a given year. And a group of 10 females should yield at least 600 offspring (potentially much more).
Cost Comparisons
It is unfortunate that I have not calculated exactly how much each rat I produce actually costs to make. But I know it's substantially less than buying frozen rats. In order to secure a single shipment of 600 rats weighing an average of 200 grams it would costs nearly $1400. That price of course includes shipping. That's approx. $2.28 per rat. If I were to guess I would say that it costs me less than $300 to produce 600 rats.
Now lets assume that a person has one animal and they wish to feed this animal one rat per day. That's 365 rats in a year. What would be the best way to produce your rats? Well it all depends on how big you want them, and how you wish to feed them, frozen/thawed or freshly killed. If you want to freeze your rats simply come up with a number of females that should (on average) meet your needs. In this case 5 or 6 females should be more than enough. By breeding them all at once you should have an average of 60 fully mature rats to kill and freeze every couple of months. But if fresh meat is your preference, you will have to be much more precise about when each female gets to reproduce.....But that's a whole nother can o' worms!
To buy a years worth of frozen rats would costs almost $850. If you divided the total into 4 quarterly shipments of rats it would cost over $900 dollars for the year! Trust me...its easier to make them yourself.
 Other things you can do to increase the efficiency of your colony are replacing your old breeders as soon as they stop producing or when they become sporadic about making a litter. Very seldomly does a good female not produce a litter when left with a male for a week. Culling is another good thing to practice as well as selective breeding. Any female that produces less than your desired litter size more than a couple times in a row (excluding her first litter) should be culled from the colony. As you produce more and more rats you will notice indivuduals that stand out and have a robust healthy look, more so than there litter mates. These individuals are good stock to hold onto and place back into the breeding program. Males love breeding, but males that are in constant company with females become lax and wont be as productive as they could be. So keep your males alone untill you have a group of females ready for breeding. Males should be replaced often, a strong 10 week old male is a breeding machine and will quickly out do his older rivals. Also I like to cull out the biters. Rats have a powerfull bite and some are more prone to be protective than others. If a female bites me when Im checking her litter or just cleaning the cage, its pretty much a death sentence for her! Staying in tune with your colony and keeping a watchfull eye on things will insure a better, more productive breeding program.
Sunday, December 03, 2006
About Me
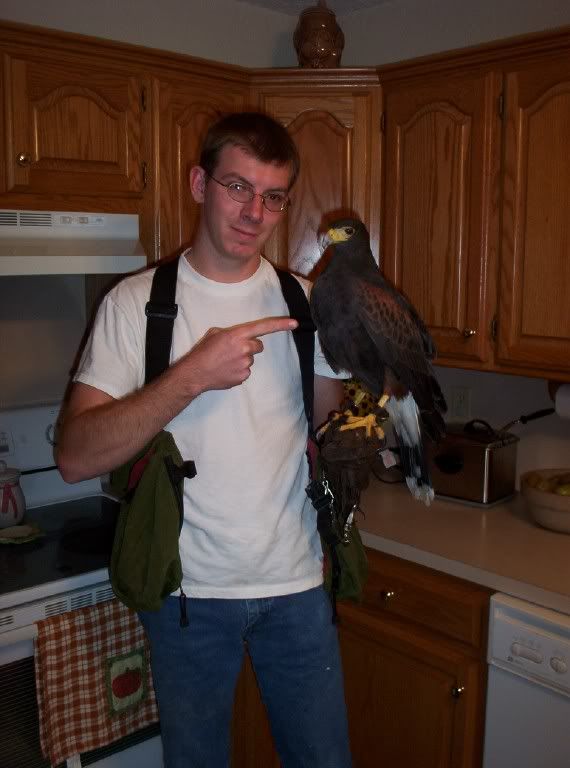
During my apprenticeship I flew passage redtails, much like any other apprentice. But instead of branching out into other species after my first two years I stuck with the redtails and I still fly them today. I have flown some harris hawks and a couple of falcons along the way, and Im sure I will fly many more, but I will always have a perch in my mews for a redtail!
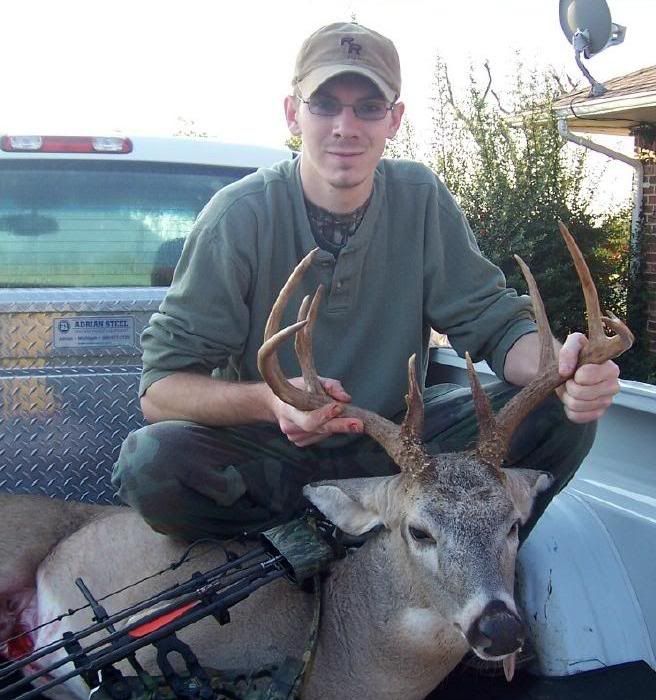 Growing up in Western Oklahoma, I was lucky enough to have a family that was full of avid hunters and fishermen. I soon began finding my own style in these hobbies and took up many forms of hunting and fishing. Among my favorites are bowhunting and flyfishing. I also spent many winters running trap lines with my brother, and running dogs on a variety of furbearers.
My other hobbies include drawing and painting wildlife, something that I find great satisfaction in. I dable with music as well and have always liked to have some kind of music played as loud as I can stand it while I do the things I do! I have a love for most birds and over the years I have kept a variety of pigeons, quail, ducks and chickens as well as various caged birds.
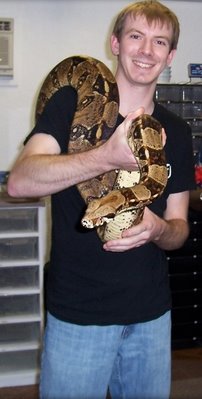 A while back I started a project that stemed from another childhood passion of mine.....Snakes! As a youngster I would collect the local reptiles to stash in my aray of jars and aquariums. And today I now have a large collection of tropical constrictors ranging from ball pythons to reticualted pythons. While I enjoy most species of snakes I have found the colombian boa constrictor to be my favorite and I focus most of my efforts on keeping and breeding them. A nice plus to this project for me is the fact that my business partner is also my father and the snakes give us an opportunity to share something we both enjoy and allow us to spend more time together. If you would like to check out our snake website please visit this link http://backwoodsreptiles.blogspot.com/
Saturday, December 02, 2006
Other Links
Google Videos
NewsOK
Tradio
Backwoods Reptiles
Monster Snakes Forum
Kingsnake.com
North American Falconers Exchange (Forum)
Links
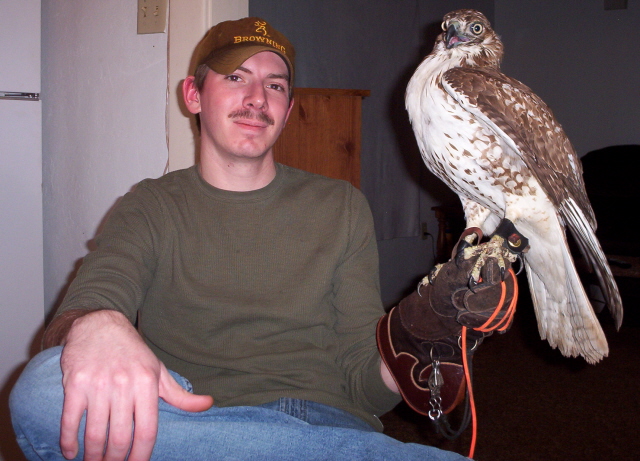
Intro
Here's my best shot at describing myself, and my falconry. I got into this sport back in Highschool, at the tender young age of 16. Thats when I became licensed anyway, I was pouring over falconry books back in grade school. Unforunatley, due to a lack of any concrete references, I didnt know that I could become a falconer as early as age 14 in Oklahoma.
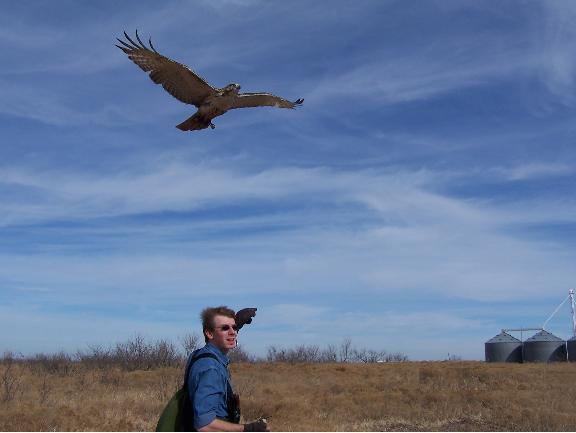
Never the less, I began my journey into the sport amongst undone homework and disgruntled teachers and parents. I was oblivious to it all though, my only concern was spending time afield with my birds. I flew redtails for the two years of my apprenticship, a male and a female. The male was lost in short time, a valuable lesson, but a hard one to accept at that age. My first female was different... a real game hawk she was. She introduced me to the Fox Squirrel in a way I had never known before. And that became my passion. Hawking squirrels in the south canadian river valley.
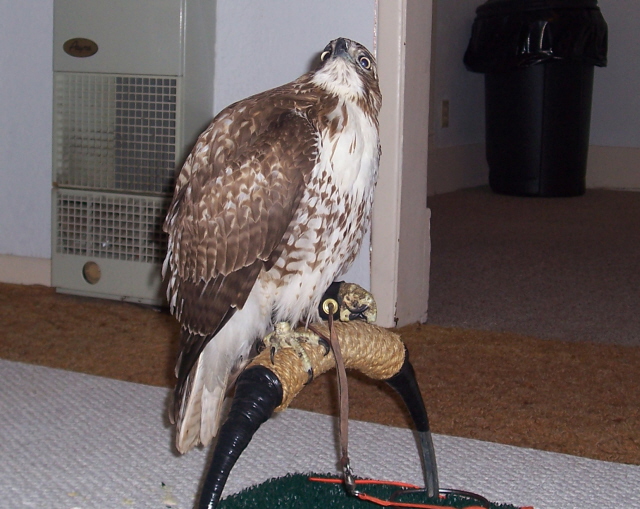
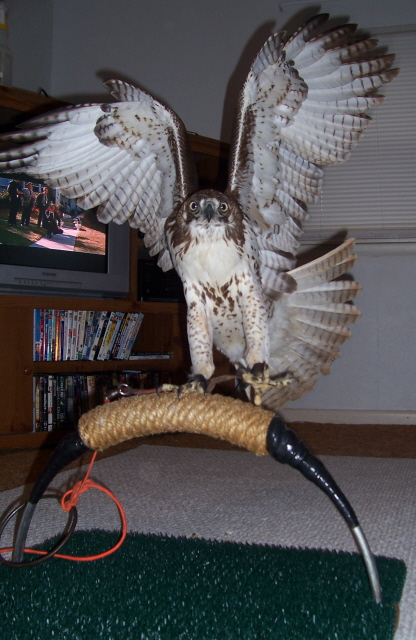
Once I upgraded my license to the general level, I was relatively unaffected by the common desire to obtain more "valuable" species to fly. Maybe it was a lack of funds....but, I stuck with my first love (the redtail) over the next few years. I flew the occasional harris, and loved them. I compare the harris hawk to a fine bird dog with feathers. They truely set the bar a little higher for the standard oklahoma dirt hawk. But at times the harris's lacked that little bit of mystery that the redtail possessed. If I had a perfectly organized schedule, with a set window of flight time every day I would certainly be flying a female harris right now, as I believe they are the perfect game hawk. But, for now my choice is the Redtail. Their sometimes suicidal approach to hunting combined with their ability to thrive under all conditions is very appealing to me. Not to mention they are extremely forgiving animals compared to other species I've dealt with.
In the past the Female Redtail was my prefered bird. But after flying a male for the last two seasons I now have a healthy respect for their capabilities as well. I have friends who are very fond of their goshawks and falcons and I admire their abality to handle these "higher class" birds. I've never dealt with the accipiters but I've had a couple run ins with some falcons that didnt go to well! In any case Im having a blast here in western oklahoma just doin what I do. What birds and quarry I will encounter in the future are but an anxiously awaited mystery..... I hope you enjoy my journal and good hawking to you all.
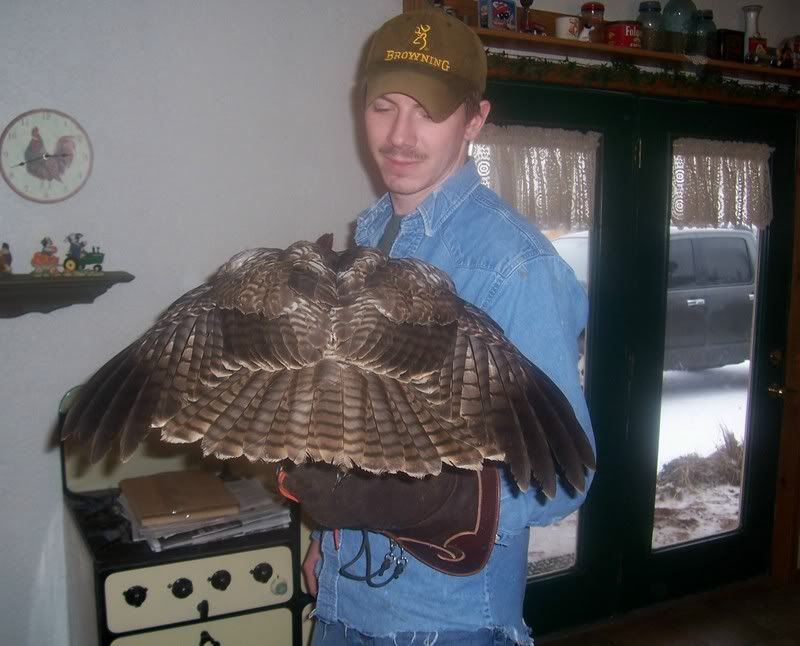
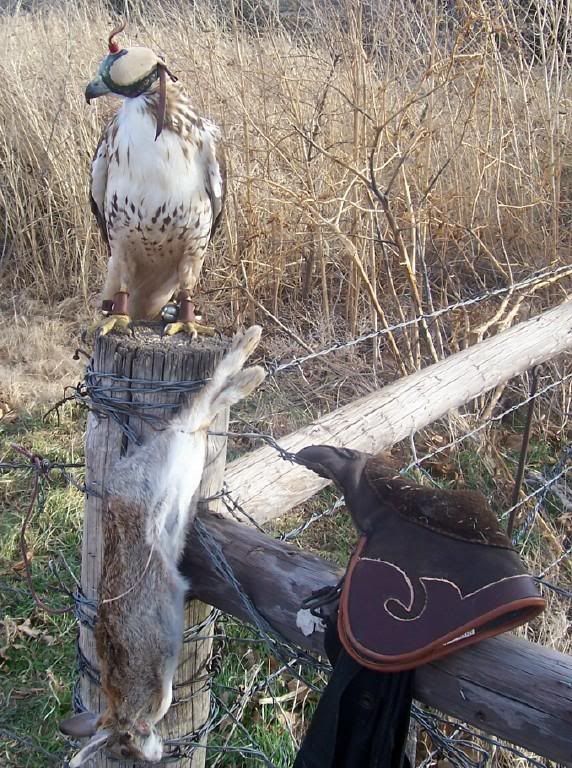
 Hawking at Calumet Dec. 05.
 Jakes Pics
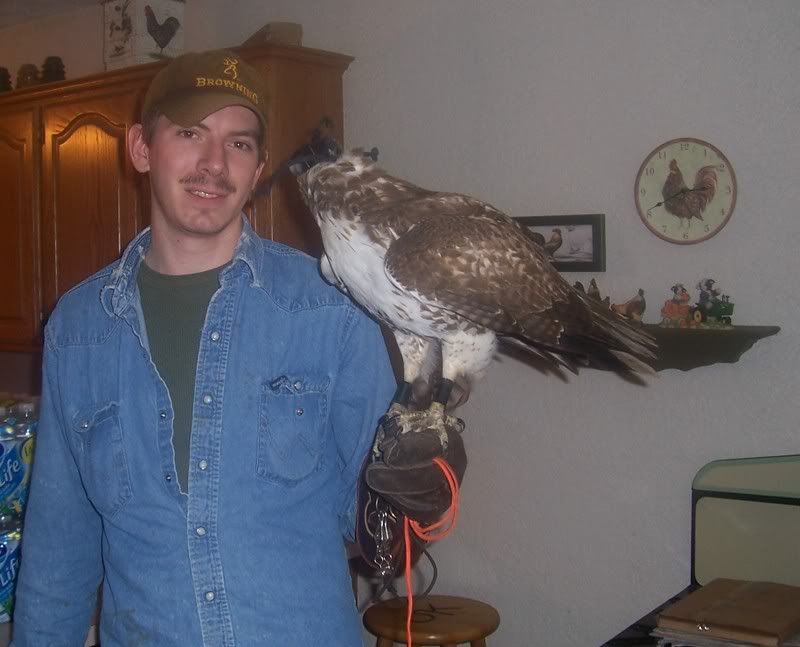
 Jake on his block - 2006
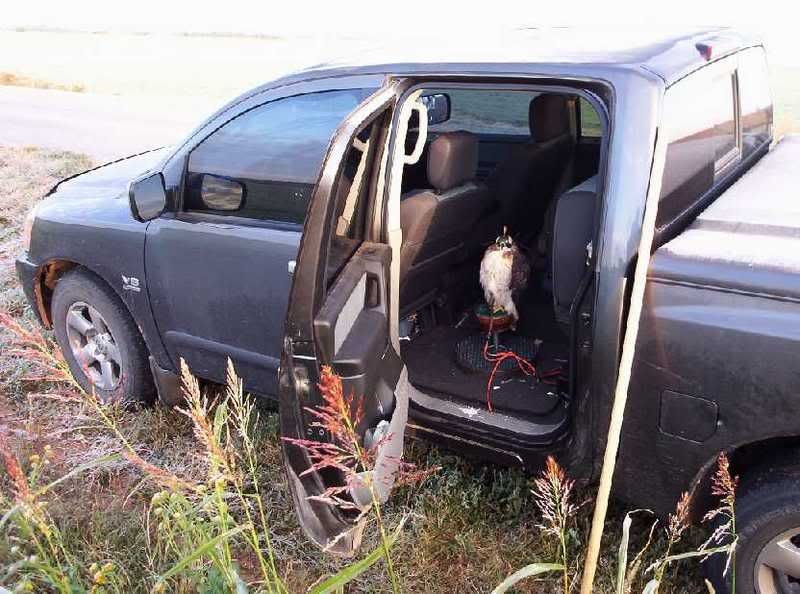 Jake's ride - 2006
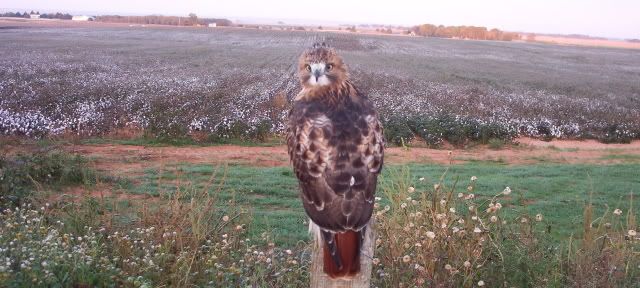 Jake hunting a cotton field - 2006.
 Jake on the lure,,,keeping an eye on the dog!
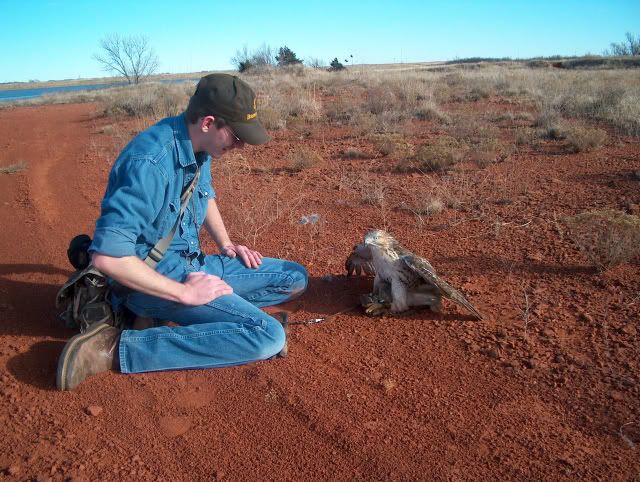 Jake on a Rabbit at Elk Lake - 2005 .
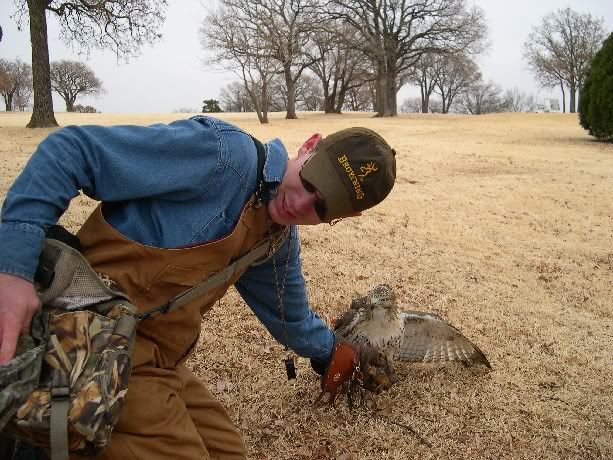 Jake on a fox squirrel in Edmond - 2005
 Me and Jake ready for some fun! - 2005
 Jake and Pete after a succesful rabbit flight - 2005
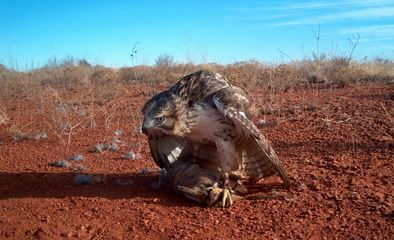
Jake on a cottontail - 2005
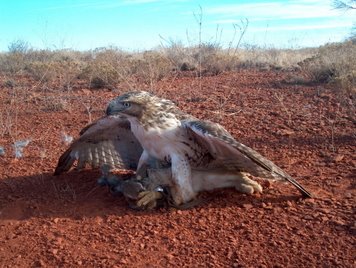
Jake on a rabbit at Elk Lake - 2005
Jake with another bunny - 2005
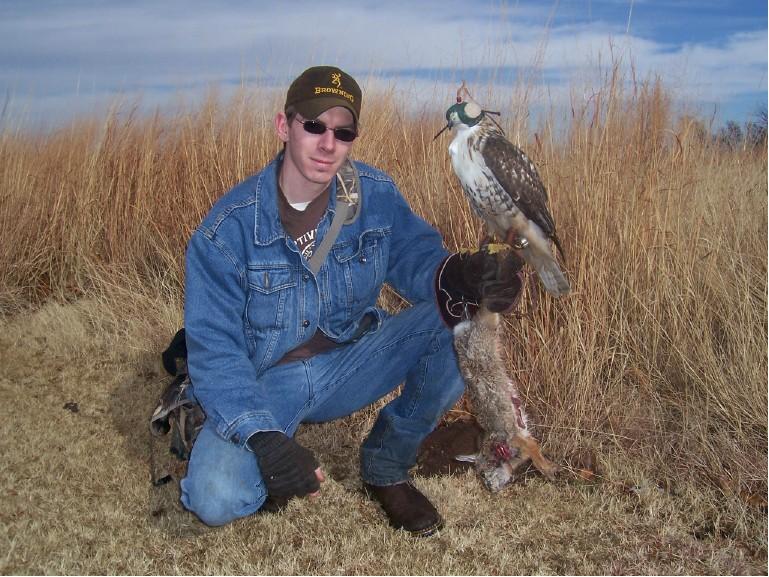 Me and Jake after a good day of hawking - 2005Hawking at Calumet - Dec. 2005